Cost Components
Cost components help your team understand what an inventory item is really made of, cost by cost.
Instead of storing only one final purchase price or selling price, Loupe Factory lets you break an item into the materials, services, and charges that contribute to its value. For example, a jewelry item may include gold, gemstones, labor, packaging, freight, duty, and overhead. Each component has its own quantity, rate, and cost, giving your team a clearer view of item cost, pricing, and margin.
Use cost components when you want pricing decisions to be based on the real inputs behind an item, not only on a final price entered at the end of the workflow.
How Cost Components Fit with Rate Profiles
Cost components and component rate profiles work together.
| Record | What it stores | Where it is used |
|---|---|---|
| Component Rate Profile | The reusable rate details, such as component name, source, currency, rate basis, rate price, status, and effective time. | Managed in the Component Rate Center. |
| Cost Component | The item-specific component quantity, rate behavior, and calculated cost for one inventory item. | Added from the item's Cost Components modal or linked in bulk from the Component Rate Center. |
The rate profile answers: what rate should this component use?
The cost component answers: how much of that component is used in this inventory item?
For example, a Gold 18K (750) rate profile may store the current rate per gram. A finished jewelry item can then link to that rate profile and store the actual grams of Gold 18K used in that item.
Important
A rate profile does not affect inventory by itself. It must be linked to a cost component on an inventory item before it contributes to item costing.
What a Cost Component Can Represent
Cost components can represent the different costs that make up an item. Your industry starting point decides which component types you can choose from.
These types are available whichever industry you chose, so time, freight, duty, and pricing adjustments are recorded the same way everywhere.
| Component type | Example use |
|---|---|
| Labor | Hands-on production time charged to the item, such as assembly, finishing, inspection, or packing. |
| Machine | Run time on the equipment used to make the item, such as a CNC machine, polishing wheel, or filling line. |
| Setup | Job setup, changeover, tooling preparation, or first-piece work before a run starts. |
| Packaging | Boxes, pouches, labels, inserts, cartons, or presentation materials. |
| Freight | Inbound freight, outbound freight, or item-level shipping allocation. |
| Duty | Import duty, customs fee, tariff, brokerage, or clearance cost. |
| Tax | Sales tax, GST, VAT, or other tax tied to the item or order. |
| Certification | Lab reports, compliance documentation, test records, or authenticity certificates. |
| Inspection | Incoming, in-process, or final quality checks charged to the item. |
| Overhead | A share of factory, warehouse, administration, or handling costs assigned to the item. |
| Wastage | Expected process loss that cannot be recovered, such as cutting, finishing, or filling loss. |
| Scrap | Recoverable offcuts, rejected parts, or remnants tracked apart from the finished item. |
| Markup | The amount added on top of cost when you set the selling price. |
| Discount | Customer discount, trade allowance, promotion, or manual price adjustment. |
On top of these, each industry adds the material and service types that matter to its own work, such as Metal and Gemstone for jewelry, Wood and Foam for furniture, LED module and Driver and control for lighting, Active ingredient and Preservative for cosmetics, and Engine part and Forced induction for auto parts. Each industry starting point page lists the full set for that industry.
This structure is useful for global B2B manufacturers and wholesalers because the same item may carry material costs, service costs, landed costs, and handling costs across several teams or locations.
What the Modal Shows
When you open the Cost Components modal, Loupe Factory shows an item summary at the top so you can review the inventory context before adding or changing costs.
The summary can include:
- product
- inventory type
- size
- weight
- quantity
- Unit Cost Price
- Unit Sell Price
- Unit Retail Price
Review this summary before saving components. It helps confirm that you are costing the correct item and using the right weight or piece count.
Prices shown depend on your role. See Inventory Pricing for who can view or edit each price. For a useful comparison, express the component estimate in the same currency and Price Basis as the unit prices. A total for ten pieces cannot be compared directly with a price per piece.
Add Cost Components to an Inventory Item
To add cost components:
- Open the inventory item you want to cost.
- Open the Cost Components modal.
- Review the item summary at the top, including product, type, size, weight, quantity, Unit Cost Price, Unit Sell Price, and Unit Retail Price, where your role allows them.
- Click Add Component.
- Choose a Component Type, such as metal, gemstone, labor, freight, packaging, or overhead.
- Select a Component Rate Profile.
- Review the component name, rate basis, source, and rate supplied by the selected profile.
- Enter the Component Quantity/Weight used for this item. The unit shown beside the field comes from the selected rate profile.
- Use the calculator button if you want Loupe Factory to auto-fill the remaining available weight or quantity for that rate basis.
- Choose the Rate Price Behavior, such as manual apply, locked, or live rate. Live rates are available for supported metal components.
- Add more components if the item has additional materials, services, or charges.
- Review the component estimate against Unit Cost Price, Unit Sell Price, and Unit Retail Price. Compare amounts using the same currency and price basis.
- Click Save Components.
Admins can also use Set selling price & Save to save the components and update the item's selling price from the total component cost.
Saving components alone does not automatically update Retail Price. Use the separate action below when you want to apply the saved estimate to it.
Set Retail Price from Cost Components
Admins can apply the saved component estimate as the item's Retail Price from the item details page.
- Review the components and click Save Components.
- On the item details page, go to Pricing Details. Check the saved estimate, the item's currency, and its Price Basis.
- Click Set as Retail Price. Loupe Factory applies the saved component estimate using the item's price basis, such as per piece or per gram.
- Review Unit Retail Price to confirm the new amount.
For example, a saved estimate of USD 600 for 10 pieces sets Retail Price to USD 60 per piece when the item's Price Basis is per piece.
This action changes only Retail Price. It needs saved components with a positive estimate and a price basis Loupe Factory can calculate. To enter a different amount yourself, use Edit Inventory Pricing.
Add Cost Components from a Spreadsheet
Admins can add or update several cost components per item from Excel or CSV. Open Inventory > Component Rate Center > Bulk link from spreadsheets, download the template, and enter one row per item with its tag ID, rate profile names, quantities per piece, and price behaviors.
Loupe Factory matches the items and profiles, then lets you correct or exclude rows before saving. An existing link to the same profile is updated; components outside the sheet stay as they are. This is useful when your collection's metal, gemstone, labor, or packaging quantities already live in a spreadsheet.
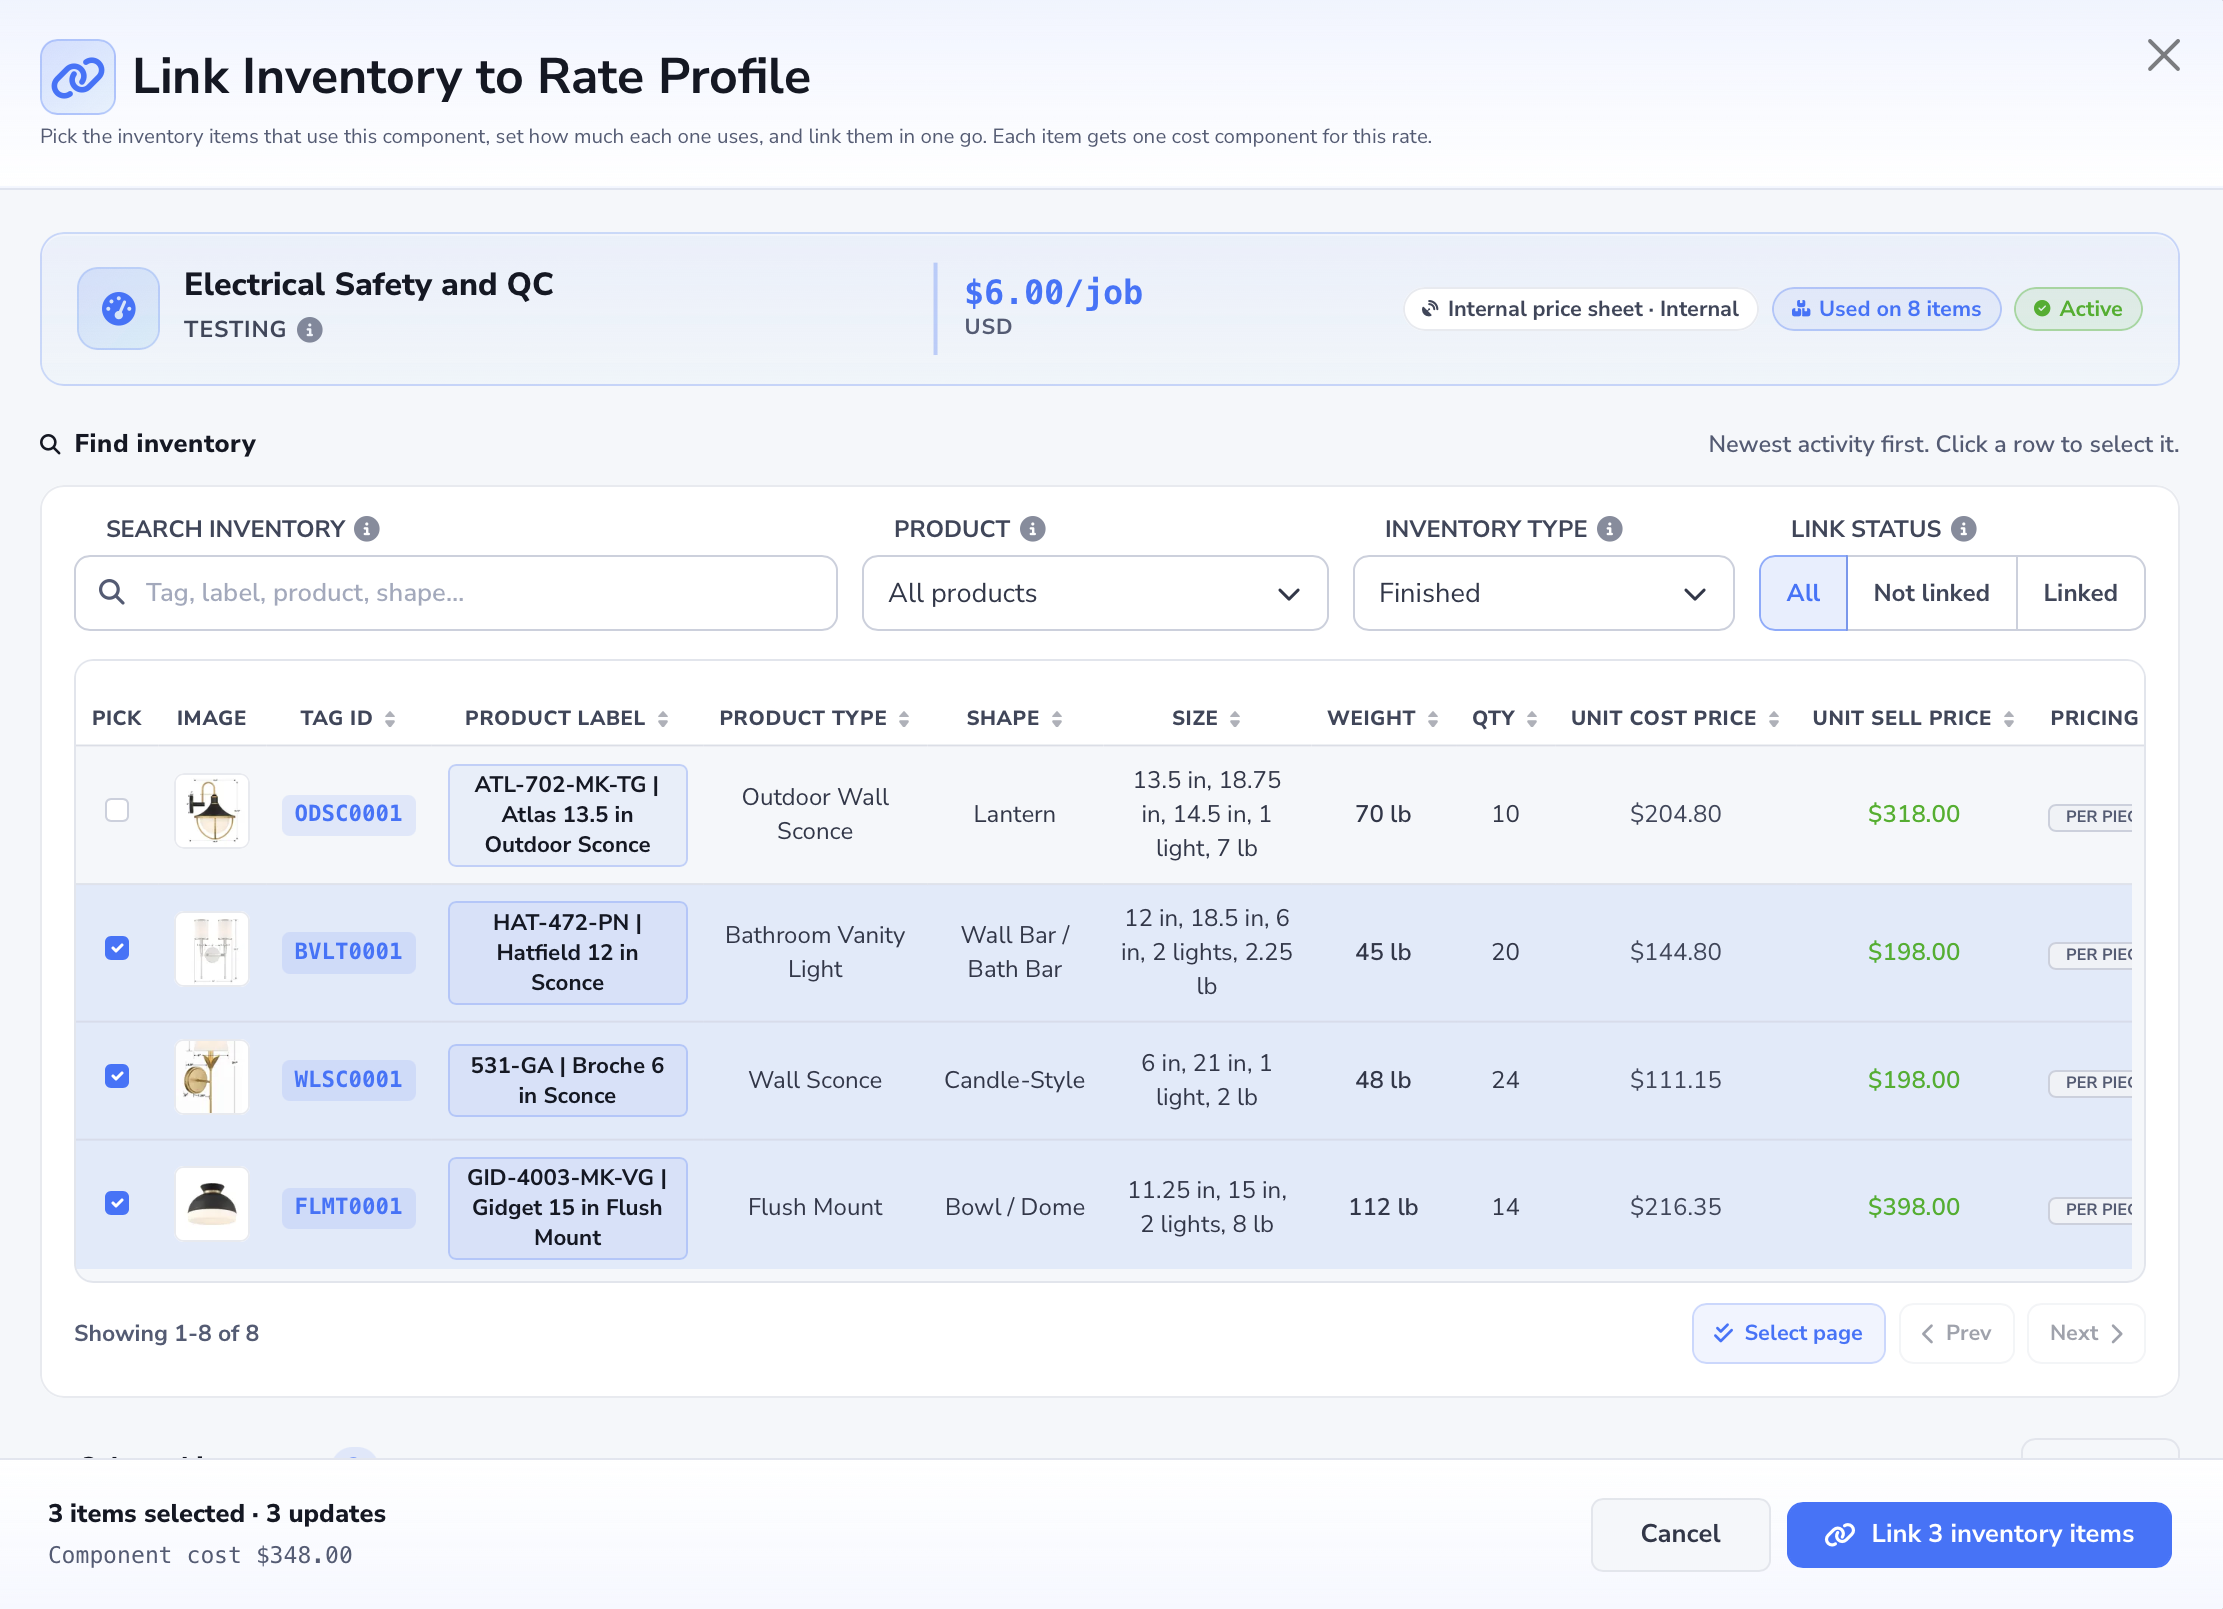
See Link Cost Components from a Spreadsheet for the steps and screenshots. To select items in the app and link just one profile, use Link Inventory to a Rate Profile. The window shows the profile at the top, a searchable inventory table, and how many items you are about to link.
Rate Price Behavior
Rate price behavior controls how the cost component uses the selected profile's rate.
| Behavior | Use it when |
|---|---|
| Manual apply | You want to apply or confirm the rate manually for this item. |
| Locked | You want the component's rate to stay fixed for this item after it is saved. |
| Live rate | You want a supported metal component to use live Market Feed rate behavior from the linked rate profile. |
Use locked rates when a quote, invoice, purchase receipt, or internal approval needs a fixed costing basis. Use live rates when the component should stay tied to supported metal market rates through its linked rate profile.
Automatic Quantity Adjustments
Loupe Factory keeps linked cost component quantities aligned with inventory changes when the component is based on weight or pieces.
When an inventory item's weight or quantity changes, matching cost components adjust proportionally. This can happen through:
- production
- order fulfillment
- returns
- purchase receiving
- shipment selection
- inventory imports
- inventory edits
For example, if an inventory item is reduced from 100 grams to 75 grams, a linked gold cost component based on grams is reduced by the same ratio. If an item's pieces are reduced, linked piece-based components adjust the same way.
This helps keep item-level costing aligned with actual stock movement instead of leaving old component quantities attached to a smaller or larger inventory item.
Components That Do Not Auto-Adjust
Some costs are not tied directly to item weight or piece count. Loupe Factory does not automatically change these component quantities when inventory weight or quantity changes.
Examples include:
- labor per hour
- job-based service charges
- flat packaging charges
- flat overhead allocations
- other time-based, job-based, or flat costs
Review these components manually when the business context changes. For example, a packaging fee may stay the same even if item weight changes, while a labor charge may depend on the actual work completed rather than the item's remaining grams.
Audit Notes for Component Adjustments
When Loupe Factory adjusts cost component quantities because of an inventory change, it records inventory notes for the adjustment.
Those notes include user context, so your team can see who made the related inventory change. This gives finance, operations, and managers a clearer audit trail when cost quantities change after production, receiving, fulfillment, returns, imports, or manual edits.
Pricing and Margin Benefits
Cost components give your team a clearer pricing base.
They help you:
- see what each item is made of from a cost perspective
- compare the component estimate with Unit Cost Price and Unit Sell Price, using Unit Retail Price as an MSRP reference
- spot margin pressure before quoting or fulfilling an order
- update selling price from the item's component cost when an admin chooses Set selling price & Save
- set Retail Price from the saved estimate when an admin chooses Pricing Details > Set as Retail Price
- keep costing aligned as inventory weight or quantity changes
- separate material costs from labor, freight, packaging, duties, service, and overhead
- explain price changes with a clearer internal cost trail
For manufacturers and wholesalers, this is especially useful when margins move because of metal rates, supplier costs, production yield, freight allocation, or service work.
Keep comparisons in the same currency and price basis. Retail Price is a reference; it does not change the item's Cost Price, Sell Price, or profit calculations.
Recommended Workflow
For best results:
- Create or review the required Component Rate Profiles.
- Open the inventory item that needs item-level costing.
- Add material components first, such as metals and gemstones.
- Add service and charge components, such as labor, freight, packaging, duties, and overhead.
- Use locked rates when the cost must remain fixed for a quote, receipt, or approved calculation.
- Use live rates only for supported metal components where live market behavior is appropriate.
- Compare the component estimate with Unit Cost Price and Unit Sell Price, and check Unit Retail Price as a reference. Use the same currency and price basis for each amount.
- Save the components, or use Set selling price & Save if you are an admin and want to update the item selling price from the component total.
- If you are an admin and want the saved estimate to become Retail Price, open Pricing Details > Set as Retail Price on the item details page. Saving components alone leaves Retail Price as recorded.
Next Steps
- Component Rate Profiles: Learn how reusable rates are created before they are linked to inventory item cost components.
- Inventory Management: Review how inventory items are added, edited, searched, and managed.
- Order Management: Understand how inventory pricing supports order workflows.