Quick Start Guide
This guide follows the actual Quick Start checklist that appears in Loupe Factory after a user logs in to the dashboard for the first time. It is the fastest way to move from a brand-new workspace to a usable operating setup.
For most new customers, the best sequence is:
- Sign up and create your organization
- Log in and open the dashboard
- Select your industry type first
- Work through the Quick Start checklist category by category
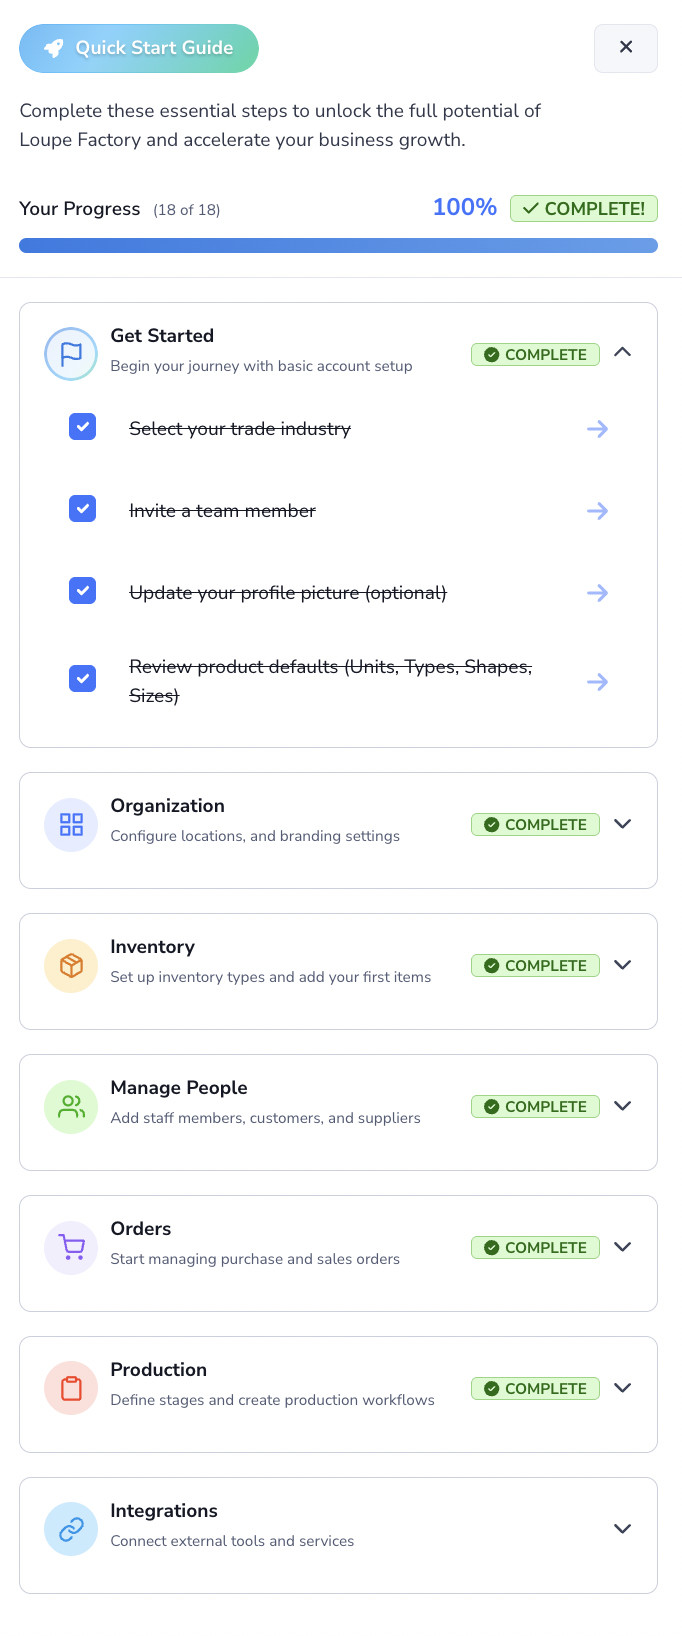
What happens after you log in
When a new workspace opens on the dashboard, Loupe Factory shows a Quick Start off-canvas with a progress bar and a checklist of essential setup tasks. If you close it, you can reopen it from the Quick Start toggle on the dashboard.
The checklist is role-aware:
- Admins see the full setup checklist for organization, inventory, people, production, and orders
- Managers see the operational tasks relevant to their permissions
- Some items are optional and do not affect the main completion percentage
Step 1: Sign up and create your workspace
Start by creating your Loupe Factory account and organization, then sign in to your workspace.
- Create your account or accept your workspace invitation
- Sign in and land on the main dashboard
- Open the Quick Start checklist if it does not already open automatically
For the complete account setup flow, see Account Setup.
Step 2: Select your industry type first
This is the most important first configuration step for a new admin because it shapes the default vocabulary and setup options used across Loupe Factory.
- Open Admin Settings > Organization Settings
- Go to the Industry section
- Select the industry that best matches your business
- Save your selection
Your industry choice influences the default product language, inventory types, materials and supplies groupings, production stages, and related business defaults used across the workspace.
Before continuing, review Industry Starting Points so you understand what Loupe Factory will preload for your business model.
Step 3: Complete the Get Started checklist
After industry selection, the Get Started section is the first checklist group to complete.
Get Started Admin Steps
Admins are guided through these tasks:
- Select your trade industry
- Invite a team member
- Review product defaults (Units, Types, Shapes, Sizes)
There is also one optional task:
- Update your profile picture
Complete the Get Started Tasks
- Confirm the correct industry is selected in Admin Settings > Organization Settings
- Review your own user profile and key organization settings first so account identity, business details, and workspace defaults are correct before you add more team members
- Invite at least one teammate who should begin using the platform
- Review the default product structure in Admin Settings > Product Settings so units, shapes, sizes, colors, and product-type language match your business
Use these references while completing this section:
Step 4: Complete the Organization checklist
For admins, the next checklist group is Organization.
Organization Required Tasks
- Add your organization logo
- Configure locations and set default
Organization Optional Tasks
- Configure other compliance details
- Configure regional and locale defaults
Complete the Organization Tasks
Use this section to align the workspace with your business identity and your operating footprint.
- Add your organization branding
- Create the main location your team will use first
- Set the default location for day-to-day operations
- Optionally add regional, language, formatting, tax, or legal details if your business needs them at launch
Use Admin Settings for a clear summary of what belongs in this area.
Step 5: Complete the Inventory checklist
The Inventory section establishes the categories and first records your team will work with.
Inventory Admin Checklist
Admins are guided through:
- Review inventory types
- Review finished inventory types
- Review materials & supplies types
- Add first materials & supplies item
- Add first inventory item
Optional:
- View all inventory
Inventory Manager Checklist
Managers usually see the operational steps only:
- Add first materials & supplies item
- Add first inventory item
Optional:
- View all inventory
Complete the Inventory Tasks
- Review the default type structure before your team starts entering stock
- Add at least one materials & supplies item such as packaging, chemicals, workshop consumables, or production support stock
- Add at least one regular inventory item that reflects the type of stock your business buys, makes, transforms, or sells
Once those first records exist, admins do not have to type the rest. Add Product to Inventory > Import Spreadsheets with AI loads a CSV or Excel file in bulk, and the same form tops up records you already have when you export them first and turn on auto-merge. See Bulk-Import Inventory Items Using AI and Update Existing Items from an Exported CSV.
Continue with:
Step 6: Complete the Manage People checklist
The Manage People section helps you create the core business records needed for day-to-day operations.
People Admin Checklist
Admins are guided through:
- Add a staff member
- Add a customer
- Add a supplier
People Manager Checklist
Managers typically see:
- Add a staff member
- Add a supplier
Complete the People Tasks
- Add at least one internal team member
- Add at least one customer if your business is ready to quote or sell
- Add at least one supplier so purchasing and replenishment can begin cleanly
These records make later workflows easier across purchasing, production, and fulfillment.
Step 7: Complete the Production checklist
The Production section helps Loupe Factory reflect how your business actually converts materials into output.
Production Checklist Steps
- Review production stages
- Create a production job
Complete the Production Tasks
- Review your stage sequence in Admin Settings > Production Settings
- Confirm that stage names make sense for your real workflow
- Create your first production job so your team can begin tracking issued material, received output, rejection, scrap, and waste
Use these references:
Step 8: Complete the Orders checklist
The Orders section starts commercial activity inside Loupe Factory.
Orders Admin Checklist
Admins are guided through:
- Review order numbering defaults
- Create a purchase order
- Create a sales order
Orders Manager Checklist
Managers typically see:
- Create a purchase order
- Create a sales order
Complete the Orders Tasks
- Review numbering prefixes before documents start being issued at scale
- Create a purchase order so incoming buying activity has a clean record
- Create a sales order so the full order-to-fulfillment flow can begin
- Open Record payment on that sales order when money arrives. See Recording Payments.
- Open your largest customer and look at Lifetime value. The gap between Invoiced and Paid is your receivables. See Lifetime value.
Use these references:
Step 9: Review optional integrations
If your business needs external system connectivity early, Loupe Factory also shows an optional Integrations checklist.
Optional items currently include:
- Import bank statements to Tally
- Connect QuickBooks Online
These do not affect the main Quick Start completion percentage, so you can finish them when your internal setup is stable.
Recommended first-day path
If you want a clean rollout, use this order:
- Sign up and log in
- Select the right industry
- Review your profile and core organization settings
- Invite a teammate
- Review product, inventory, and production defaults
- Add your first materials and supplies item
- Add your first inventory item
- Add staff, customer, and supplier records as needed
- Create a production job
- Create your first purchase order
- Create your first sales order
Next Steps
- Dashboard Overview: understand the dashboard and how to move between modules
- Industry Starting Points: review the default setup for your industry
- Definitions: align your team on the language used across products, inventory, orders, and production
- Admin Settings: know exactly where to customize each business area