Users & Access
Use Admin Settings > Users & Access to control who can sign in to your Loupe Factory workspace. Admins can invite team members, review invitation status, assign roles, and remove access when someone no longer needs it.
Before You Start
Only admins can open Admin Settings > Users & Access. If you do not have admin access, ask an existing admin to invite users or update roles for you.
Login Seats and Staff Records
Only people who sign in count toward your plan's login-seat limit. Staff records without login access are free and can still be assigned to operational work.
| Plan | Login seats included | Additional login seats |
|---|---|---|
| Starter | 1 | Not available |
| Professional | 3 | $29 USD per additional user per month |
| Business | 5 | $29 USD per additional user per month |
| Enterprise | Unlimited | Included in custom terms |
Professional and Business can support up to 100 total login users. Add or remove seats as the team changes. Annual add-on seats receive the same two-month saving as the annual base plan.
Inviting a Team Member
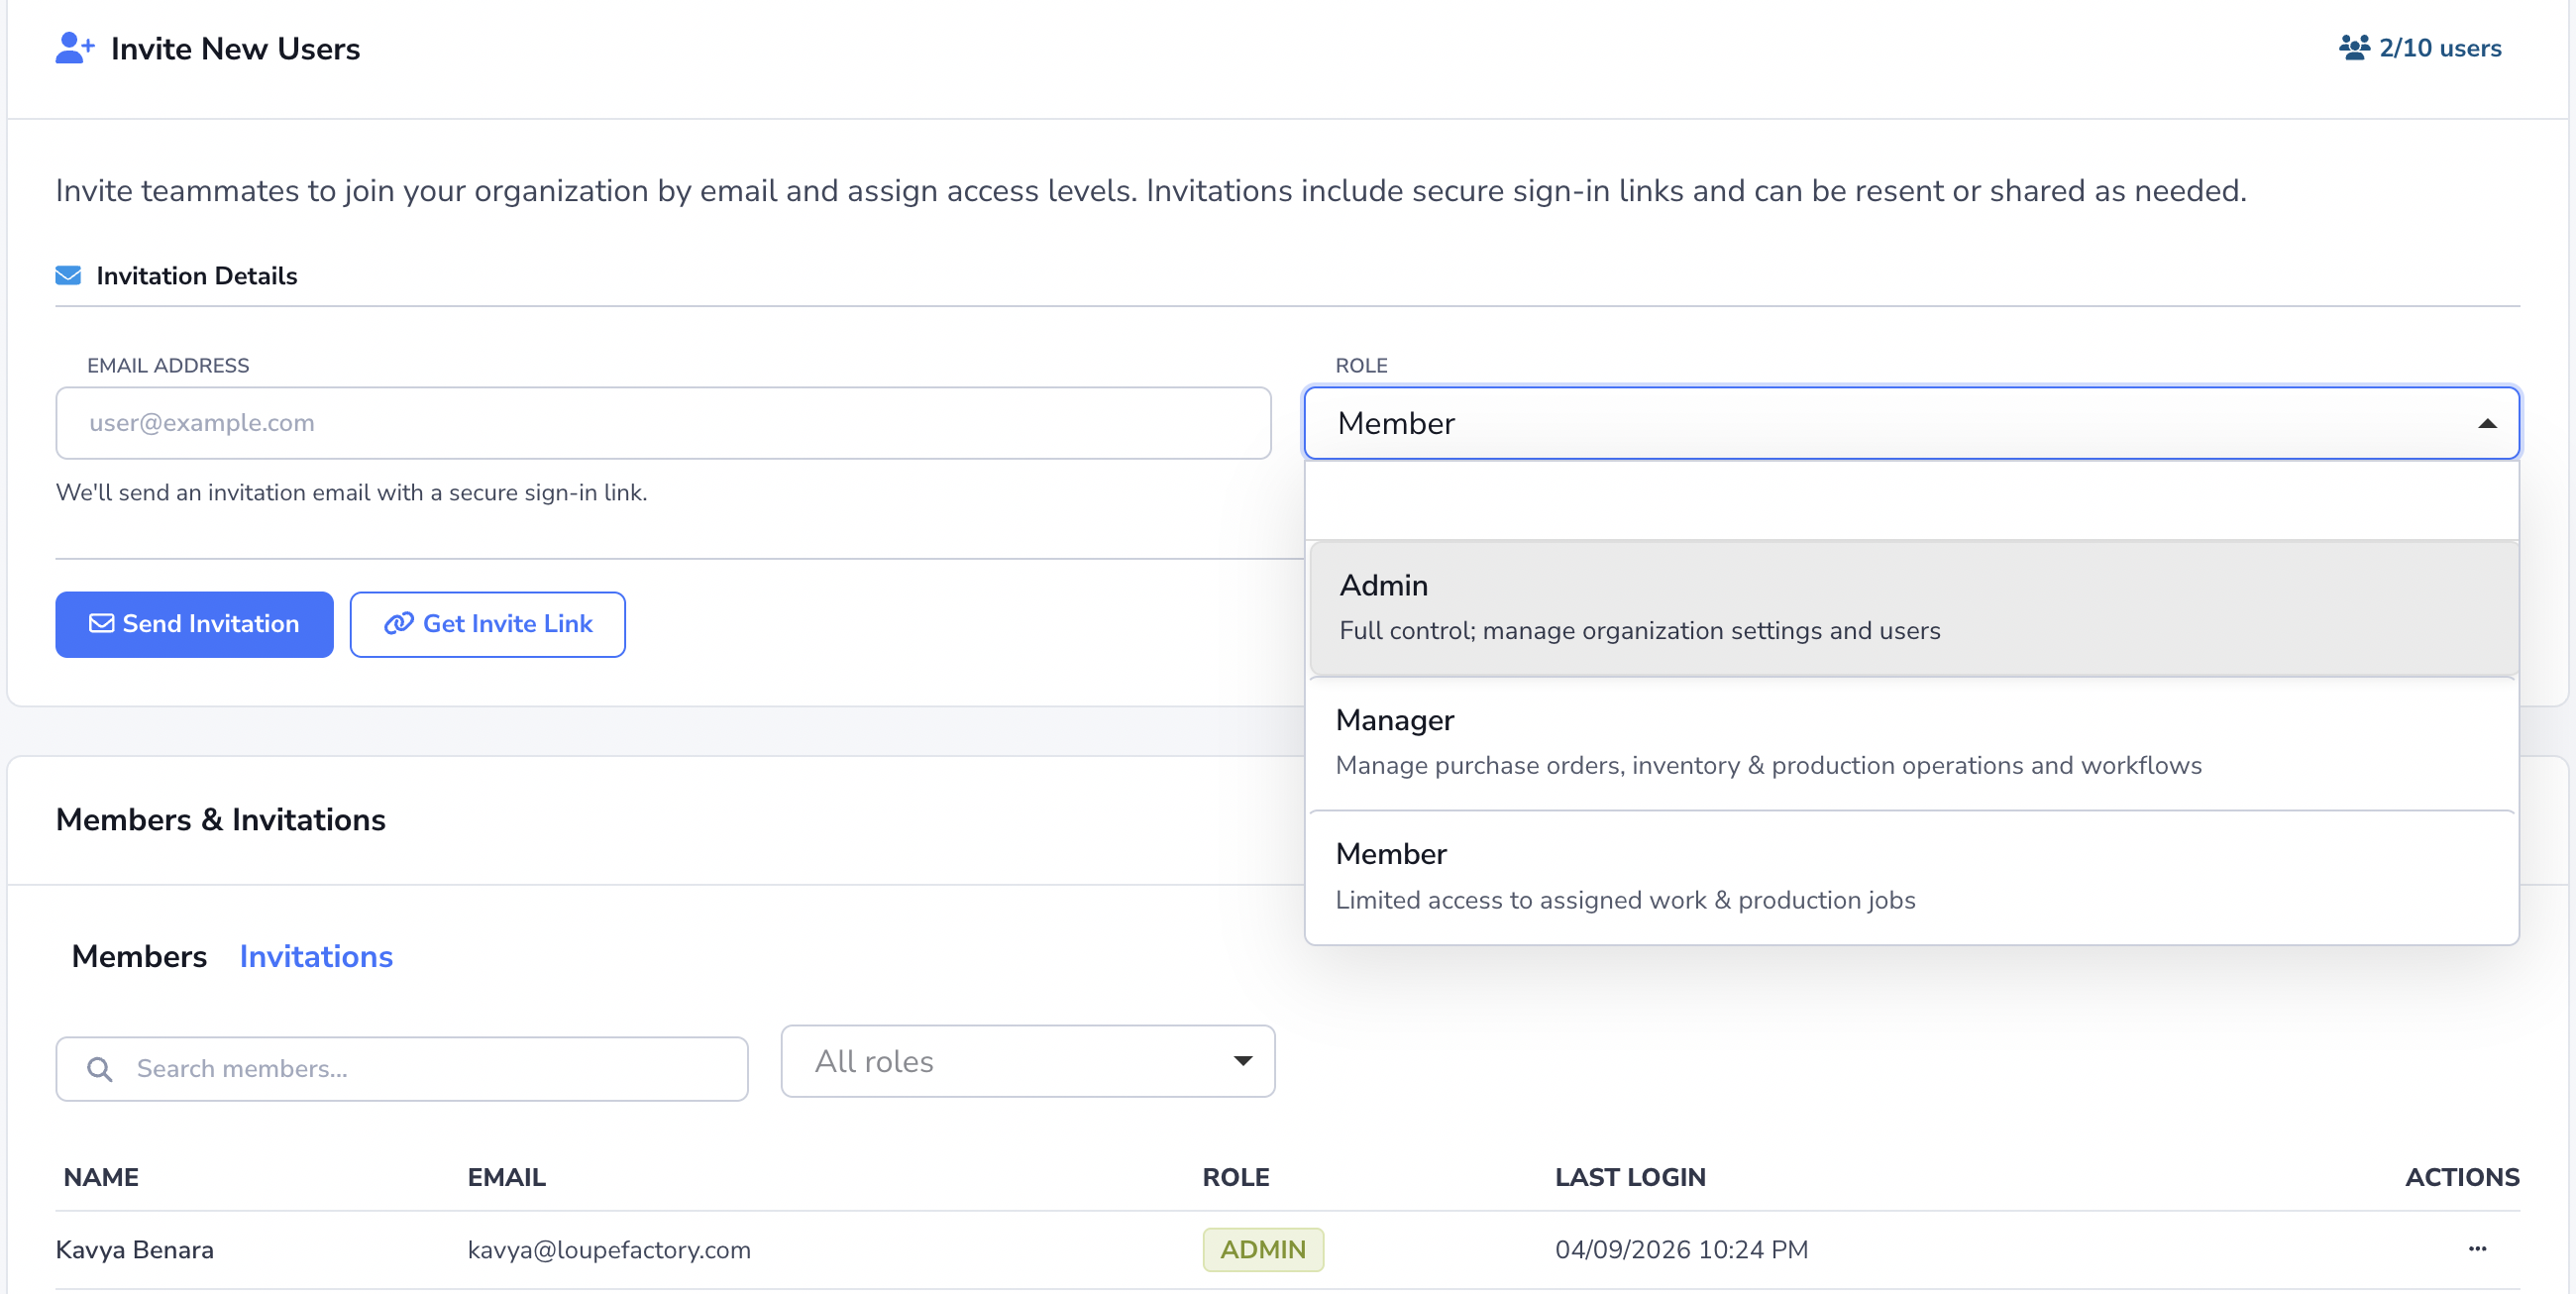
Use the Invite New Users section when you want to add someone to the workspace.
- Go to Admin Settings > Users & Access.
- In Invite New Users, enter the person's Email address.
- Choose the appropriate Role.
- Click Send Invitation.
- If you prefer to share access manually, click Get Invite Link and send the secure link to the person directly.
After you send the invitation, Loupe Factory tracks it in the Invitations tab so admins can see whether it is still pending or has already been accepted.
If an invitation would exceed your included seats, add a seat or change plans before the new user joins the workspace.
Managing Members
Use the Members tab to review everyone who already has access to your organization.
From this tab, admins can:
- search for a member by name or email
- filter the list by role
- review role badges and last login information
- open row actions to update a role or remove access
Changing a Team Member's Role
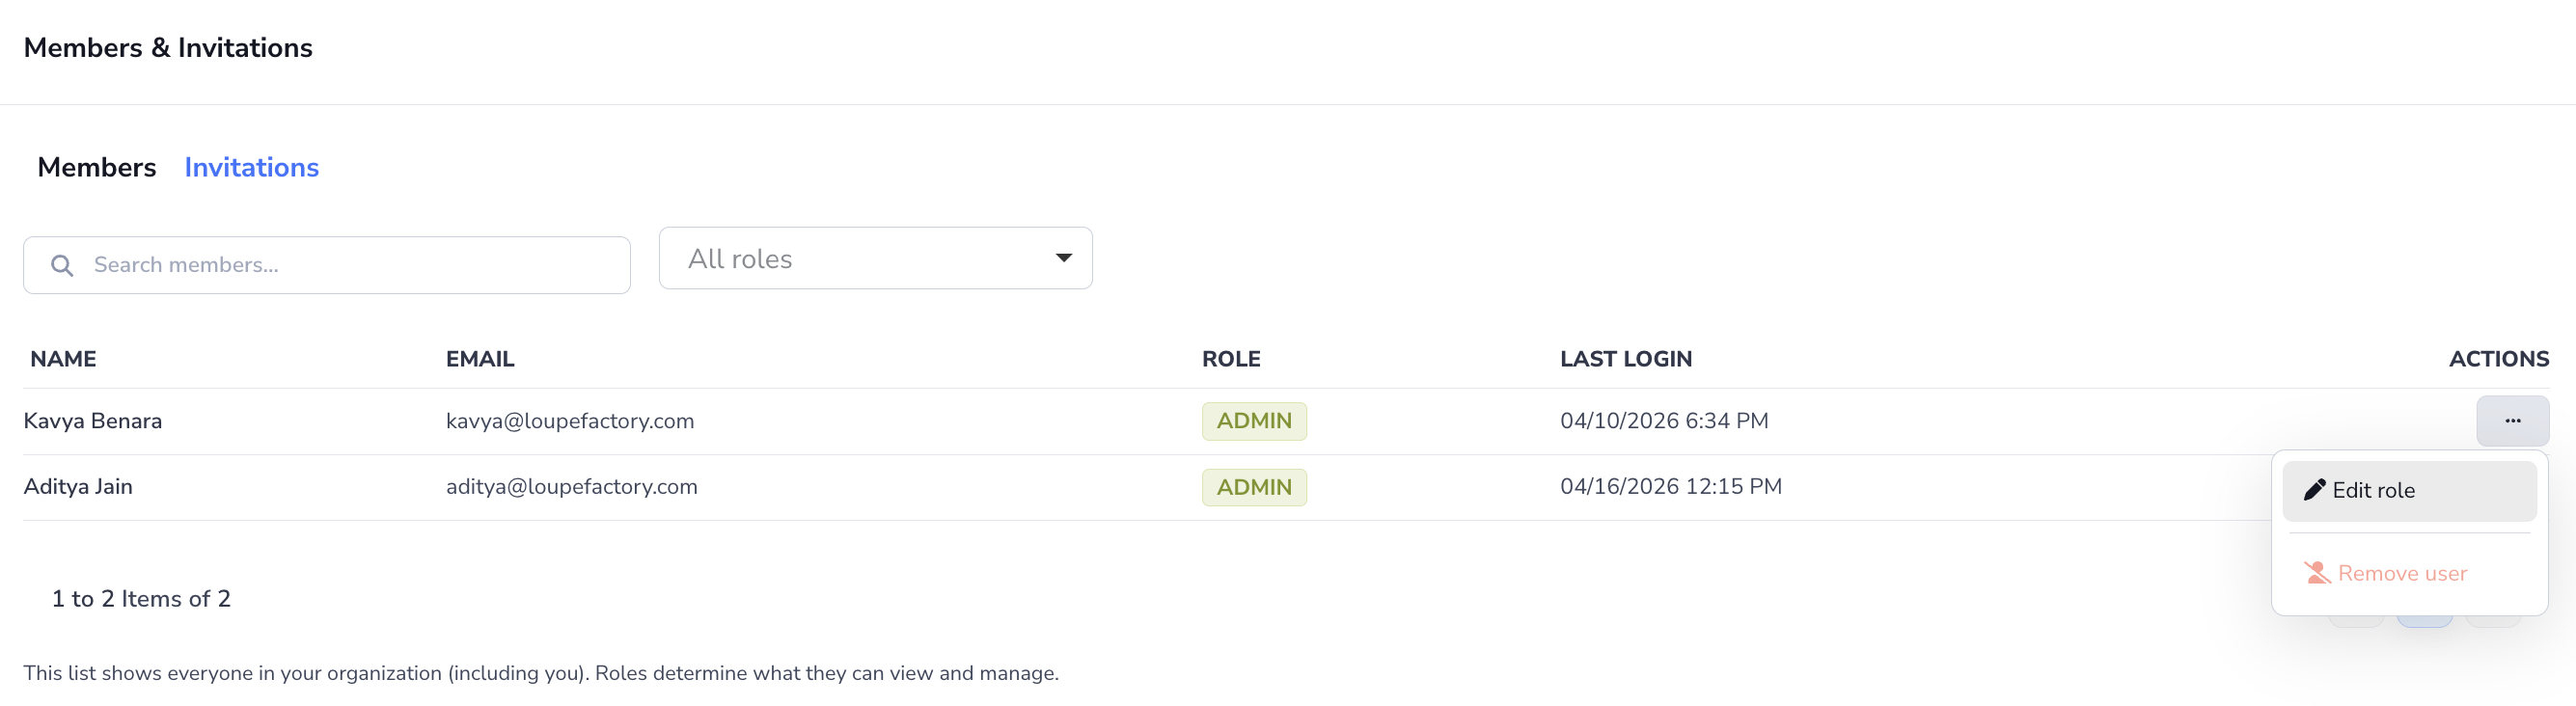
- Go to Admin Settings > Users & Access > Members.
- Find the person you want to update.
- Click the ⋯ menu on that row.
- Select Edit role.
- Choose the new role.
- Click Save.
Use role changes when someone needs a different access level but should remain in the workspace.
Choose Manager when operations should create and follow sales orders without receiving the customer directory, inventory cost sheet, sales-order exports, or administrative controls. Choose Admin when the person needs payments, invoices, customer records, or list exports. See Security and Access.
Managing Invitations
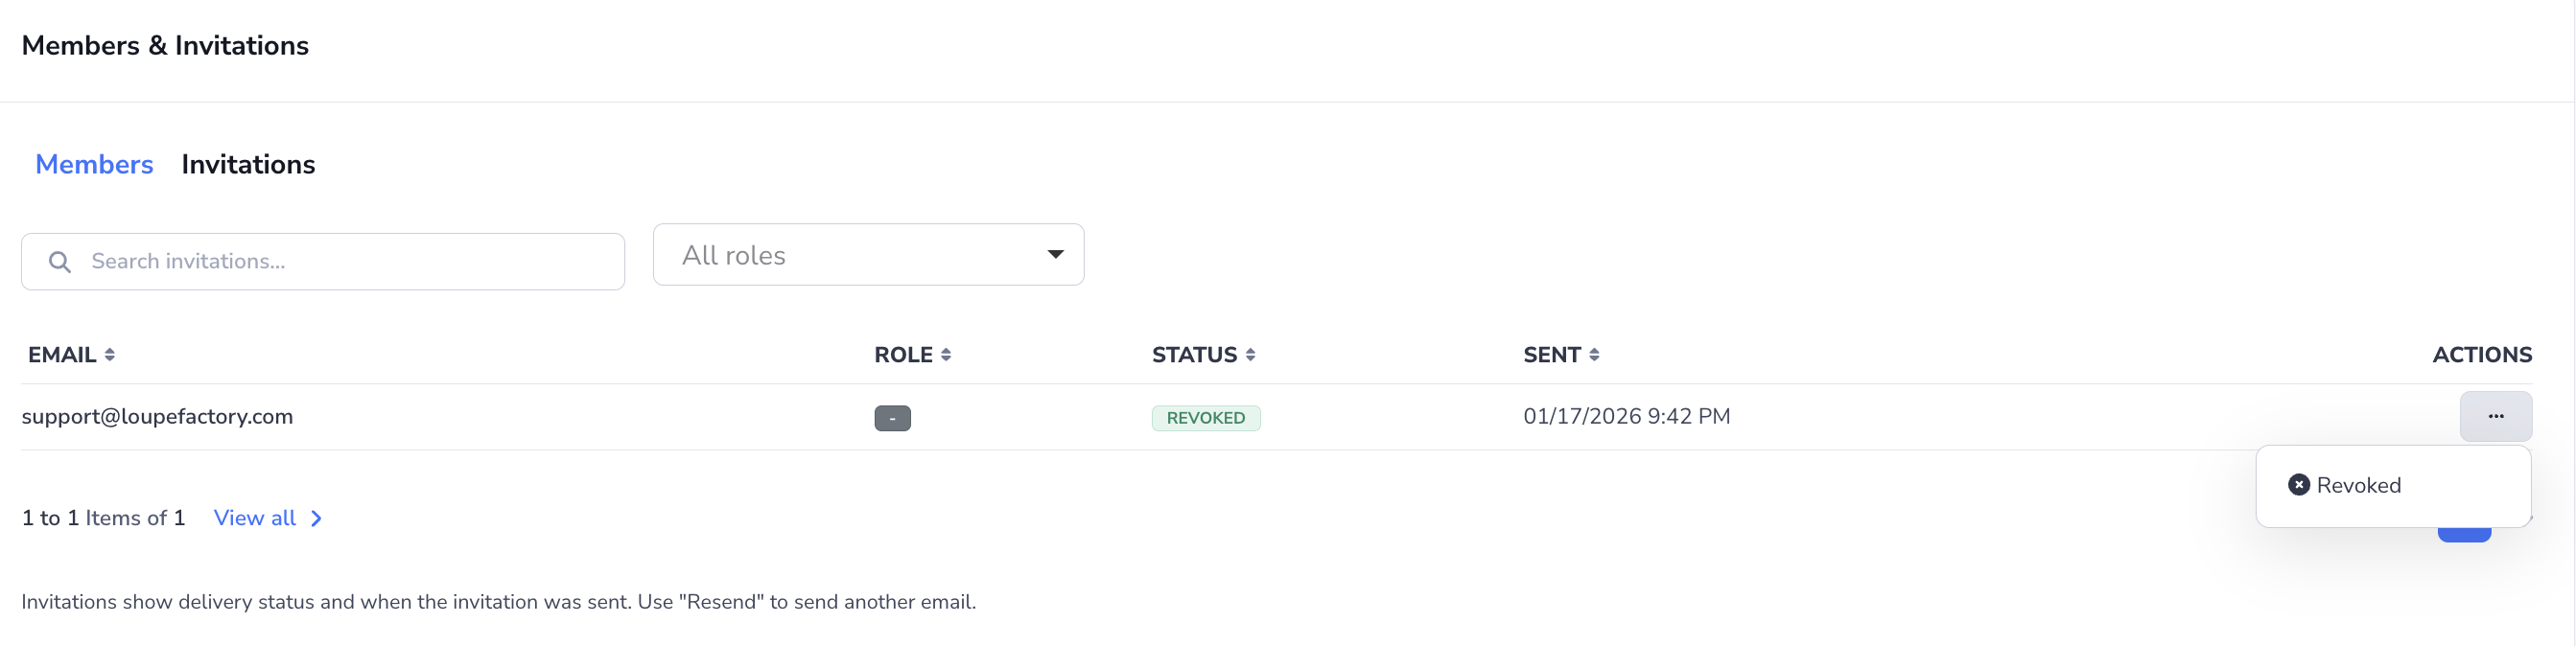
Use the Invitations tab to review invitations that have not yet been fully completed.
From the invitation row actions, admins can:
- resend an invitation email
- copy the invite link again
- revoke an invitation that should no longer be used
Once someone accepts the invitation, manage their access from the Members tab instead.
Removing a Team Member
Remove a user when they should no longer be able to sign in to your organization.
- Go to Admin Settings > Users & Access > Members.
- Find the person in the member list.
- Click the ⋯ menu on that row.
- Select Remove user.
- Confirm the removal.
Keep at least one trusted admin in the workspace at all times. A signed-in user should not remove their own access from this screen.
Next Steps
- Pricing & Plans: Compare included login seats, additional-seat pricing, roles, and plan limits
- Organization Settings: Update branding, locations, defaults, and compliance details
- Security and Access: Review what Admin, Manager, and Member roles can do
- Staff Management: Create staff records for operational assignment
- AI Credits & Billing: Review billing and credit usage for your workspace